
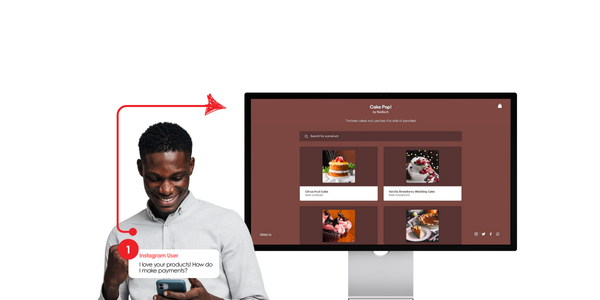
If you’ve been selling on Instagram, WhatsApp, or even Twitter, chances are you’ve spent countless hours replying to the same questions: “How much?”, “Is it still available?”, “How do I pay?”
At some point, it becomes clear; to grow your business and reduce daily stress, you need something more organized, more scalable, and more automated. That’s where owning your own e-commerce website comes in. It may sound techy or expensive, but it doesn’t have to be. With the right tools and a bit of guidance, you can launch your own store online, no coding, no big budgets, and no stress.
Whether you sell clothes, skincare, food, art, or digital products, here’s your complete guide to moving from DMs to a proper digital storefront.
Why You Need an Online Store
As your business grows, so should your capacity to manage and serve more customers. Having your own e-commerce site puts you in control and makes it easier for people to buy from you — anytime, anywhere.
Here’s what you gain:
✅ Full Display of Your Products
Customers can browse your stock, choose what they want, and pay — all without going back and forth in your DMs.
✅ Sell 24/7
Even when you’re asleep or busy, your store keeps working. You can wake up to orders and focus on fulfillment.
✅ Easy, Secure Payments
Customers can instantly access multiple payment options to you; cards, bank transfers, or QR codes. And you don’t have to chase payments.
6 Easy Steps to Launch Your Online Store
Step 1: Choose a Website Address & Platform
First, you need a domain name, that’s your website’s address (like yourbrand.com). You can purchase one via platforms like GoDaddy, Hostinger, Namecheal or Whogohost etc. Whichever provider you eventually choose, you will be able to own your website address.
Next, pick a website builder. Platforms like Wix, Shopify, or WordPress let you build your store without writing any code. Just drag, drop, and upload. We recommend you start with a free or low-cost plan while you’re still testing and learning.
Step 2: Upload Your Products
Take clear photos of your products using natural light and a clean background (your phone camera works just fine).
For each item, include:
- Name
- Price
- Short description
- Delivery info (free or paid)
Make sure everything is easy to read and visually appealing.
Step 3: Set Up Payments
You’ll need a payment gateway to collect payments from your customers.
We offer end-to-end support for businesses setting up online commerce on RedPay. With FREE access to our E-commerce Payment Gateway, you can be integrated within 24 hours, once you’ve submitted the necessary KYC. You’ll be able to accept:
- Card payments
- Bank transfers
- QR code payments
- USSD (optional)
Each transaction is secure, and customers get instant receipts, while you get paid fast.
Step 4: Add Delivery Details
Let customers know:
- Delivery timelines
- Costs
- Pickup options (if available)
You can start with local delivery services like GIGM, Gokada, Kwik, or even Jumia Logistics if your order volume is high.
Step 5: Build Trust
Your website should feel real and credible. Add:
- A simple “About Us” page
- Contact information (phone, email, WhatsApp)
- A clear Return/Refund Policy (even if you don’t accept returns — just state it clearly)
- A WhatsApp chat button so customers can reach you easily
These small touches go a long way in building trust.
Step 6: Launch & Announce It!
Let your followers know: “We now have a website!”
Post across all your channels: Instagram, WhatsApp, Twitter, etc.
Offer a small launch promo, maybe free delivery or 10% off for the first 10 orders. Ask your loyal customers to check it out, give feedback, and help spread the word.
Ready to get started?
With the right tools and some determination, you can take your hustle from DMs to a digital shop that works for you. RedPay makes it easy for you to accept secure payments online
Get started today on www.redpay.africa or email us at sales@redtechlimited.com, and we’ll help you launch the store your business truly deserves.